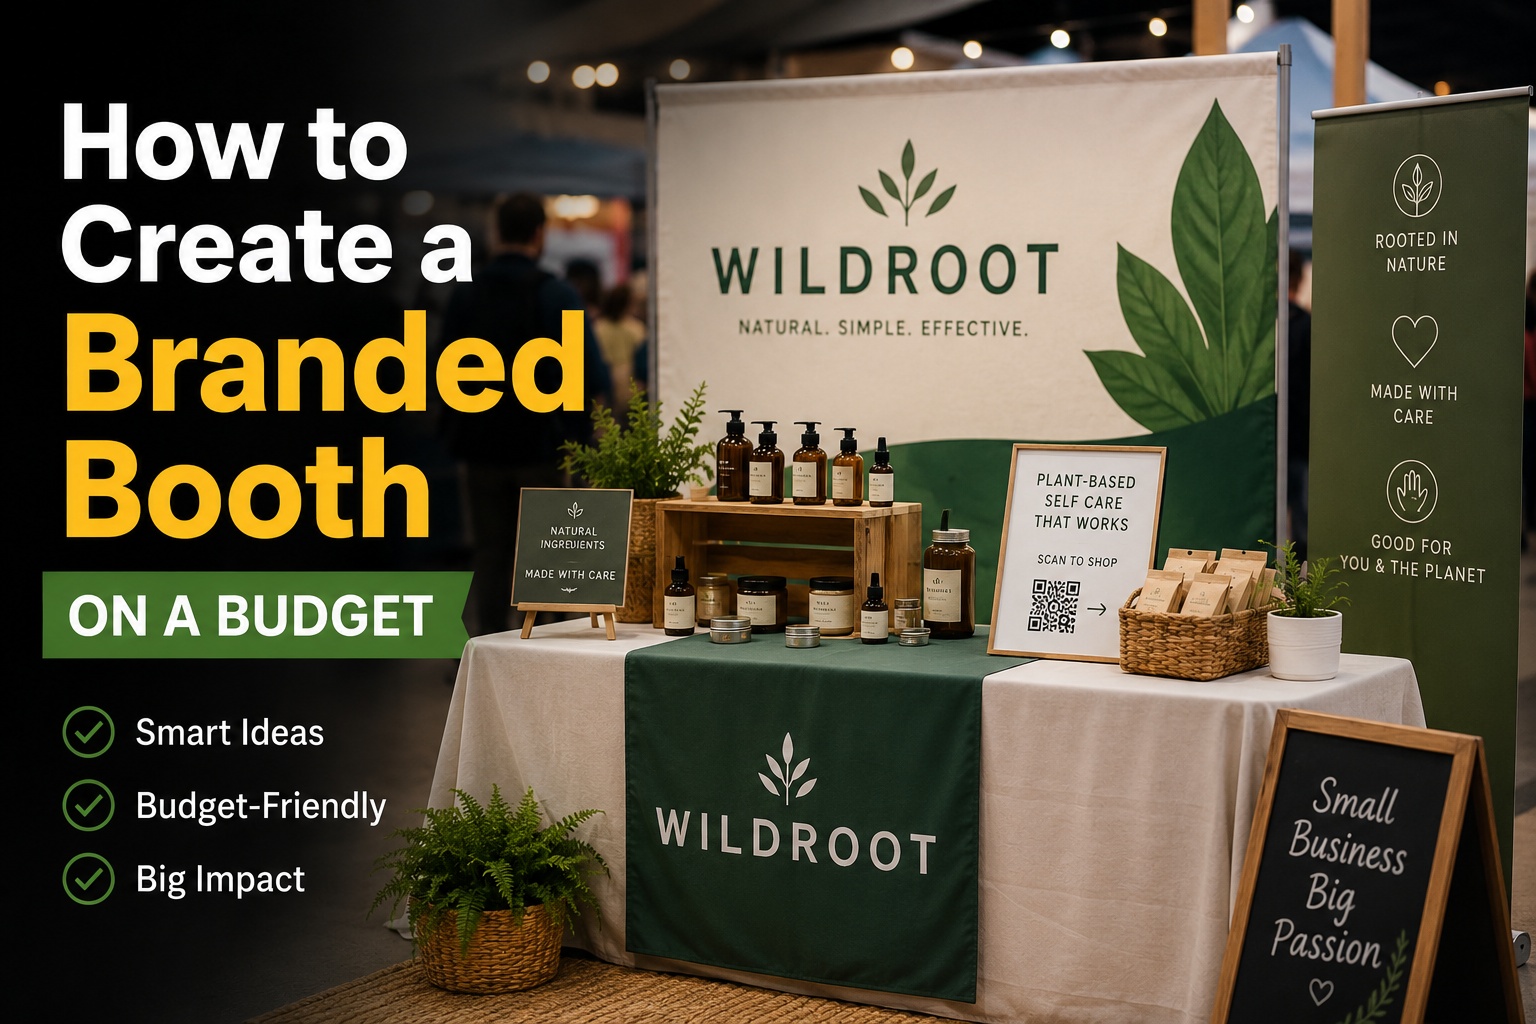
TLDR
- A branded booth does not need to be expensive. It needs to be clear, organized, and easy to understand from a few steps away.
- Spend first on the pieces people see fastest: signage, table presentation, product display, and a simple giveaway.
- Use reusable items like banners, table covers, display risers, QR codes, and branded stickers.
- Keep your message short. A crowded booth often looks cheaper than a simple one.
- Plan the booth around one goal: sales, leads, samples, bookings, newsletter signups, or brand awareness.
A small booth can do a lot with very little. The trick is not making it look like you spent more money than you did. The trick is making every piece feel intentional.
Learning how to create a branded booth on a budget starts with clarity. People walking through a market, trade show, school fundraiser, craft fair, pop-up event, or convention are not studying every table. They are scanning. They notice your name, your main offer, your colors, your display, and maybe one small detail that makes them stop.
That means your booth does not need ten signs, a huge backdrop, and a pile of giveaways. It needs one clear message, a tidy layout, and enough branded details to make the business feel real.
Start With One Booth Goal
Before buying anything, decide what the booth is supposed to do.
Not every event booth has the same job. A bakery at a farmers market wants sales. A contractor at a home show may want leads. A skincare brand at a pop-up may want samples and email signups. A school club may want donations. A small artist booth may want people to browse longer and remember the name later.
Pick one main goal:
- Sell products at the booth
- Book consultations
- Collect email signups
- Hand out samples
- Build brand awareness
- Drive people to a website or social page
- Explain a service quickly
- Get people to scan a QR code
- Create repeat customers after the event
Once you know the goal, the booth becomes easier to plan. If you want sales, your display needs pricing, product access, and a checkout flow. If you want leads, you need a signup method and a reason for people to leave their information. If you want brand awareness, your name and offer need to be visible from a distance.
A budget booth fails when it tries to do everything at once.
Build Around Three Visual Zones
A simple booth works best when it has three zones: the distance zone, the table zone, and the take-home zone.
The distance zone is what people see as they walk by. This usually includes a banner, backdrop, table cover, or vertical sign. Keep this area simple. Your business name, logo, and short message are enough.
The table zone is what people see when they stop. This includes products, samples, pricing cards, displays, brochures, QR codes, and staff. This zone should answer the next question: “What is this, and what should I do?”
The take-home zone is what people leave with. This could be a sticker, business card, sample, coupon, product label, flyer, or QR code card. It does not need to be expensive. It just needs to help them remember you after the event.
This framework keeps the booth from turning into a pile of nice but disconnected items.
Spend Where People Notice First
A branded booth on a budget should not feel bare, but it also should not waste money on pieces people barely notice.
Start with the most visible items:
| Booth Item | Why It Matters |
|---|---|
| Main sign or banner | Helps people understand who you are from a distance |
| Table cover or runner | Makes a basic table feel more finished |
| Display risers | Adds height and helps products stand out |
| Pricing or info cards | Reduces repeated questions |
| Stickers or small giveaways | Gives visitors something easy to take |
| QR code sign | Connects the booth to your website, menu, signup form, or shop |
You can skip fancy pieces at first. Custom flooring, neon signs, expensive fixtures, oversized displays, and large printed walls can look great, but they are not required for a first booth.
A simple banner, clean table, thoughtful product layout, and small branded giveaway can look better than a large booth with no clear message.
Use Stickers as Low-Cost Branding Tools
Stickers are one of the easiest ways to make a booth feel branded without buying all-new fixtures.
You can use them on sample bags, product boxes, jars, cups, envelopes, giveaway cards, order pickup bags, notebooks, water bottles, display containers, and take-home packets. They are small, flexible, and easy to change from one event to the next.
For simple logo giveaways, low-quantity die cut stickers are a good fit because you can test a design without committing to a huge order. That matters if you are still working out your booth colors, packaging, or event message.
A few practical sticker ideas:
- Logo stickers for visitors to take
- QR code stickers on display cards
- Thank-you stickers for purchases
- Product name stickers for sample bags
- Seasonal stickers for limited-time events
- “Follow us” stickers with social handles
- Coupon code stickers on postcards
- Packaging stickers for plain bags or boxes
Stickers work because they add branded repetition. When the logo shows up on the sign, table, packaging, and giveaway, the booth feels more complete.
Keep the Main Message Short
Long booth messaging does not usually work. People are moving. They may be carrying bags, talking to someone, or trying to decide where to stop next.
Your main booth message should answer three questions quickly:
- Who are you?
- What do you sell or offer?
- Why should someone care right now?
For example:
- “Small-batch hot sauce made in Austin”
- “Custom wedding stationery and day-of signage”
- “Dog treats made with simple ingredients”
- “Book a free home solar estimate”
- “Hand-poured candles inspired by national parks”
Avoid vague taglines that sound nice but do not explain anything. “Designed for your lifestyle” may work in a larger campaign, but it does not do much on a crowded event floor. Clear beats clever here.
A good test: someone should be able to understand your booth in five seconds.
Make the Table Look Intentional
Most budget booths start with a table. That is fine. A table can look professional if it is organized well.
Start by removing visual clutter. Do not place every product, flyer, tool, and supply on the table at once. Use the table as a display surface, not a storage area.
Use height where you can. Risers, crates, shelves, acrylic stands, trays, small boxes, and baskets can make the display easier to scan. Products laid flat across a table often look less valuable than products arranged with some vertical structure.
Group products by category, price, scent, size, flavor, style, or use case. Add small cards that explain each section. This keeps visitors from having to ask basic questions before they even know if they are interested.
A simple table setup might include:
- One table cover
- One vertical sign
- One product display area
- One small basket of sticker giveaways
- One QR code card
- One checkout or signup area
- One hidden bin under the table for extra stock
Not the most glamorous part of booth design, but hiding the backup tape, bags, snacks, chargers, and extra inventory does help.
Use Sticker Sheets for Giveaways and Samples
Single stickers work well, but sticker sheets can be even better for events where you want a more memorable handout.
A sticker sheet can include your logo, slogan, icons, product illustrations, social handle, mascot, and small decorative designs. It feels more substantial than a single sticker, but it can still be easy to hand out.
For artists, coffee brands, gyms, schools, skincare brands, bookstores, and local shops, custom sticker sheets can double as both a giveaway and a brand sample. Visitors may keep them, share them, or stick them on laptops and water bottles later.
The best sticker sheets for booths usually have:
- One clear brand mark
- A few small fun designs
- Simple colors that match the booth
- A QR code or social handle if it fits naturally
- Enough white space so the sheet does not feel crowded
Do not turn the sticker sheet into a brochure. Let it feel like a useful or fun object first.
Add a QR Code, But Give People a Reason to Scan
QR codes are helpful, but they are not magic. People need a reason to scan.
A QR code can lead to:
- A discount code
- A menu
- A booking page
- A newsletter signup
- A giveaway entry form
- A product catalog
- A portfolio
- A wholesale inquiry form
- A social page
- A simple landing page for the event
Place the QR code where people can scan it without bending over or blocking traffic. Put it on a small sign, table card, sticker, flyer, or display stand. Test it before the event, then test it again after printing.
The copy near the QR code should be specific.
Instead of:
“Scan me”
Use:
“Scan for 10% off your first order”
“Scan to book a free estimate”
“Scan for the full scent list”
“Scan to join the giveaway”
“Scan to see custom order options”
That small line of context makes the QR code feel useful instead of decorative.
Use Roll Labels for Product Samples and Packaging
Events often involve small samples, product packets, bottles, boxes, jars, bags, or envelopes. This is where roll labels can help.
If you are packing many of the same item, label rolls for packaging can make the process faster and more consistent than placing individual loose stickers by hand from a stack. They also help a plain sample bag or box look more finished.
Roll labels work well for:
- Food samples
- Candle boxes
- Soap packaging
- Skincare samples
- Drink bottles
- Product bags
- Event kits
- Thank-you packaging
- QR code labels
- Price labels
- Flavor or scent labels
A budget booth does not always need custom boxes or elaborate printed bags. A plain kraft bag with a clean label can look intentional when the logo, color, and message match the rest of the booth.
Create a Small Booth Kit You Can Reuse
The cheapest booth is not always the one with the lowest first purchase. It is often the one you can reuse.
Build a small booth kit that stays packed between events. This saves time and prevents last-minute buying.
Your booth kit might include:
- Table cover or runner
- Banner or sign
- Display risers
- Product trays
- Pricing cards
- QR code signs
- Stickers
- Business cards
- Tape
- Scissors
- Pens
- Markers
- Safety pins
- Chargers
- Extension cord
- Cleaning wipes
- Small trash bag
- Backup payment reader
- Extra bags or packaging
- Inventory checklist
Keep the kit simple. After each event, write down what you used, what you forgot, and what you did not need. The second booth is usually easier than the first because you stop guessing.
Budget Booth Ideas by Event Type
Different events need different booth priorities.
For a craft fair, focus on product display, pricing, and packaging. People want to browse and buy quickly.
For a trade show, focus on a clear main sign, lead capture, and a simple explanation of what you do. People may not buy on the spot, but they may become leads.
For a school fundraiser, focus on easy signage, simple pricing, and fast checkout. Parents and students are usually moving through quickly.
For a farmers market, focus on samples, visible product names, and repeat-purchase reminders. Stickers, cards, and labels can help people find you again.
For a convention, focus on memorable visuals and take-home items. Sticker giveaways can work well because attendees often collect small items throughout the day.
For a service business booth, focus less on product display and more on trust. Use before-and-after photos, a clean banner, reviews, service area details, and a QR code that leads to a quote request form.
Common Budget Booth Mistakes
A budget booth can look polished, but a few mistakes make it feel thrown together.
The first mistake is using too many messages. A booth with five offers, three taglines, and twelve signs is hard to understand.
The second mistake is putting everything flat on the table. Add height. Even small risers can make a booth feel more organized.
The third mistake is forgetting the back of the booth. Bags, boxes, snacks, and loose supplies can become the visual background if you do not hide them.
The fourth mistake is choosing giveaways that do not connect to the brand. A small, useful, branded item is better than a random item people throw away.
The fifth mistake is not practicing the booth pitch. Your display gets people to stop. Your words help them decide what to do next.
Prepare a short line your staff can use when someone walks up:
“Hi, we make custom gift boxes for local businesses. These are our three most popular styles.”
“Hi, everything on this table is handmade in small batches. The best sellers are right here.”
“Hi, scan this code and you can enter the giveaway or see our full product list.”
Simple works.
A Practical Starter Booth Plan
Here is a simple setup for a small business trying to create a branded booth on a budget:
| Item | Purpose |
|---|---|
| One banner or vertical sign | Helps people understand the booth from a distance |
| Table cover or runner | Creates a cleaner branded base |
| Two or three display risers | Adds height and makes products easier to browse |
| Small pricing cards | Answers common questions quickly |
| QR code sign | Sends people to a shop, booking page, or signup form |
| Branded stickers | Gives visitors something to take |
| Branded packaging labels | Makes purchases and samples feel finished |
| Hidden storage bin | Keeps the booth clean during the event |
This setup is not complicated. That is the point. It gives you enough structure to look prepared without building a custom trade show display from scratch.
FAQs
What is the cheapest way to brand a booth?
The cheapest way to brand a booth is to use a clear sign, a clean table setup, consistent colors, and small branded details like stickers, labels, cards, or packaging. You do not need a large custom display if your message is easy to understand.
What should I put on my booth sign?
Your booth sign should include your business name, logo, and a short explanation of what you offer. Avoid long descriptions. People should understand the booth from a few steps away.
Are stickers good giveaways for booths?
Yes, stickers are good booth giveaways because they are easy to hand out, easy to transport, and useful for brand recall. They work best when the design is simple, attractive, and connected to the business.
How do I make a vendor table look professional?
Use a clean table cover, group products neatly, add height with risers, hide extra supplies, use small pricing cards, and keep the main message clear. A tidy booth usually looks more professional than a crowded one.
Should I use a QR code at my booth?
A QR code is useful if it leads to something specific, such as a discount, menu, booking page, signup form, or product catalog. Add a short instruction near the code so visitors know why they should scan it.
What should I avoid when creating a budget booth?
Avoid too much text, too many signs, cluttered tables, tiny logos, random giveaways, and hidden pricing. A budget booth should feel simple and easy to understand.
Conclusion
A branded booth on a budget is not about making everything look expensive. It is about making the booth feel clear, consistent, and easy to approach.
Start with one goal. Build around a strong sign, a clean table, simple product displays, and take-home materials that match your brand. Use stickers, labels, QR codes, and reusable booth pieces to stretch your budget across multiple events.
A small booth can still feel polished. It just needs a plan.
References
- CustomStickers.com, Custom Die Cut Stickers
- CustomStickers.com, Custom Sticker Sheets
- CustomStickers.com, Label Rolls
- VistaPrint, Trade Show Booth Design Ideas
- VistaPrint, Trade Show Booth Checklist
- Lush Banners, Trade Show Booth Buying Guide
- SmartyTags, How to Use QR Codes at Trade Shows and Expos
- UPrinting, Budget-Friendly Trade Show Tips
Intent Sentence: This post helps small business owners, makers, and event vendors create a branded booth on a budget by explaining how to prioritize signage, layout, stickers, labels, QR codes, and reusable display pieces, so they can look organized without overspending.